Bring a whole new level of ambiance and functionality to your home with the power of DIY lighting upgrades! This comprehensive guide will walk you through the cost-saving benefits, types of fixtures, essential tools and materials, safety precautions, and common issues you may encounter during your lighting installation journey.
The Cost-Saving Advantages of Installing Lighting Fixtures Yourself
Taking the DIY route for lighting installation not only saves you money on labor costs but also allows you the freedom to choose the perfect fixtures for your home without being limited by the suggestions of a professional. Plus, it's a fantastic opportunity to learn a new skill and gain a sense of accomplishment.
Types of Lighting Fixtures
Illuminate your home with stylish and practical lighting fixtures. Explore the options below and choose what suits your aesthetic and functional needs.
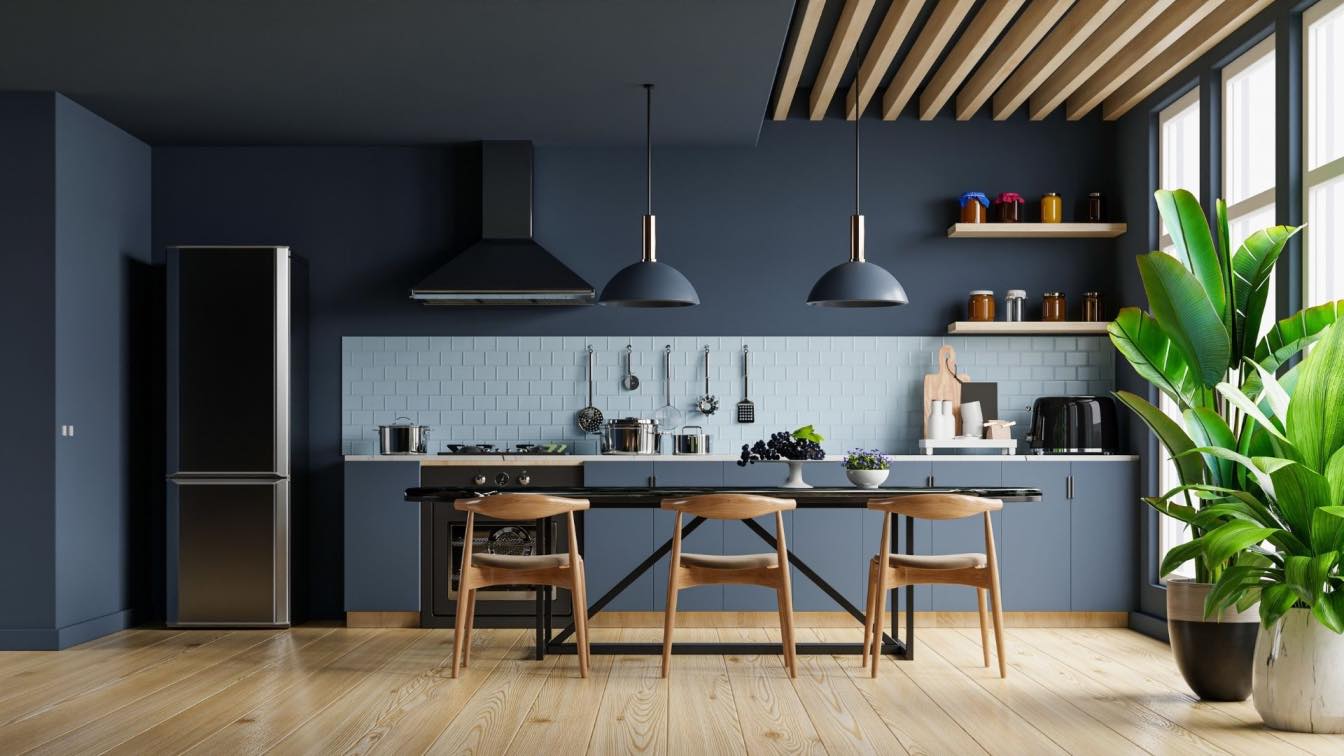
Chandelier: A statement piece for your dining area or foyer, chandeliers add a touch of elegance and sophistication.
Pendant Lights: These versatile fixtures work well over kitchen islands or dining tables, offering focused lighting and a modern flair.
Ceiling Fixtures: Ideal for general room lighting, ceiling fixtures come in various designs, ranging from minimalist flush mounts to semi-flush mounts.
Recessed Lighting: A sleek option for low ceilings, recessed lights blend seamlessly into the ceiling, providing soft, ambient light.
Wall Sconces: Add character and accent lighting to hallways, bedrooms, and living areas with wall sconces.
Smart Lighting: Control your home's ambiance with a tap of your finger or voice command using smart bulbs and switches.
Track Lighting: Highlight artwork or create a dynamic atmosphere with adjustable, multi-directional track lights.
Which Fixtures Work Best for Different Rooms in the House
Consider the purpose and size of each room when selecting fixtures. Chandeliers and pendant lights work well in dining rooms, while ceiling fixtures and recessed lighting suit living areas and bedrooms. Wall sconces are perfect for hallways, and track lighting is great for showcasing artwork.
Tools and Materials Needed
Gather your arsenal of tools and materials to ensure a smooth and successful installation process.
Wire stripper/cutter: To remove insulation and trim wires to size.
Screwdriver (flathead and Phillips): For assembling fixtures and securing connections.
Pliers: To twist and grip wires during installation.
Voltage tester: To ensure no electrical current is present when working.
Wire connectors: To join and insulate wires.
Electrical tape: For added insulation and securing wires.
Ladder: To reach your ceiling fixtures safely.
Light fixture: Your chosen fixture for installation.
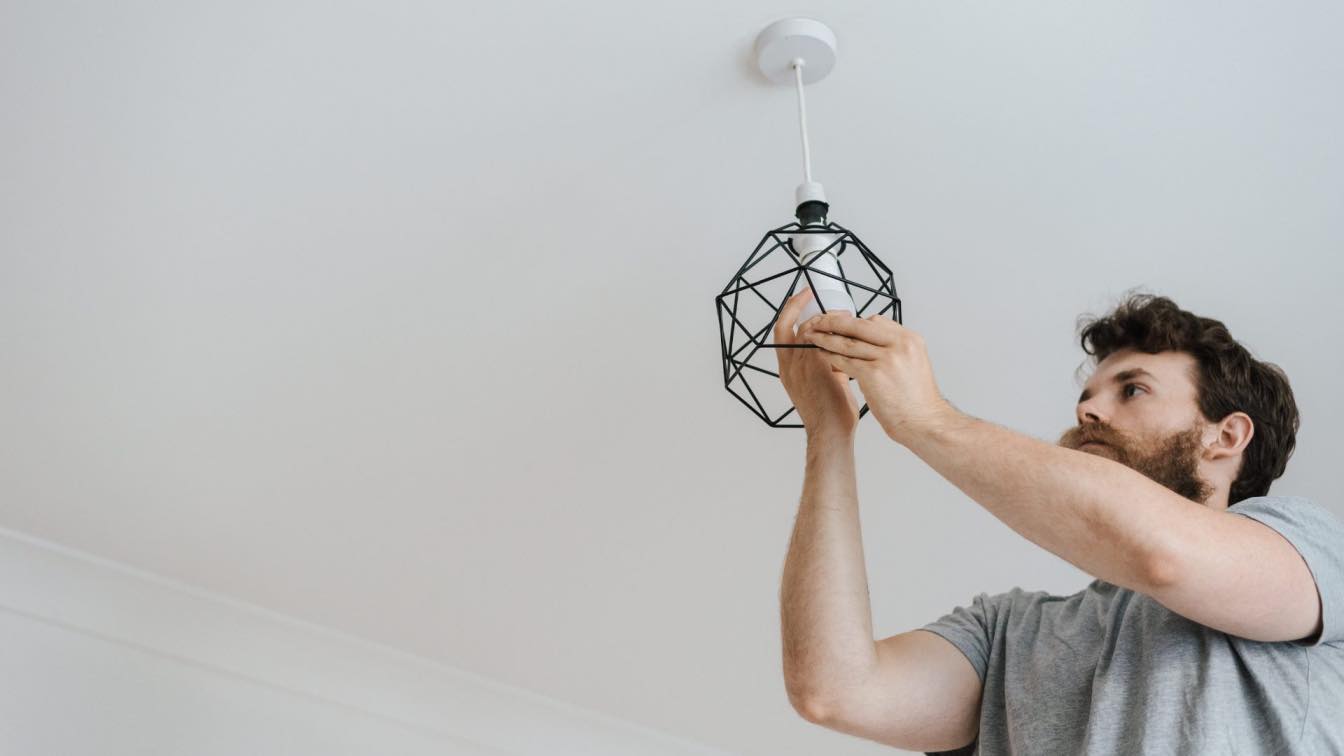
Safety Precautions
Safety first! Follow these precautions to avoid hazards and ensure a successful installation:
Turn off the power at the circuit breaker: Never work with live wires.
Remove the old fixture and inspect the wiring and junction box: Check for damage or wear.
Ensure that the new fixture is compatible with the wiring and junction box: Use a kw to amps converter if necessary to determine compatibility.
Assemble the new fixture according to the manufacturer's instructions: Follow the guidelines for a secure installation.
Have a helper hold the fixture while you connect the wiring: A second pair of hands can prevent accidents and make the process easier.
Common Issues Encountered During Lighting Installation
Be prepared for potential challenges and learn how to troubleshoot them:
Loose connections or wires that are not properly secured: Double-check and tighten all connections, using wire connectors and electrical tape for added security.
Incorrect wiring, which can lead to a tripped breaker or even a fire: Always consult the manufacturer's instructions and ensure that wires are connected correctly (e.g., matching colors or labels).
Bulbs that do not work or burn out quickly: Inspect the fixture for damage and ensure the wiring is correctly installed. Also, confirm that you are using the recommended bulb type and wattage.
Dimming or flickering lights: Check that your bulbs are compatible with your dimmer switch, or consider replacing the switch itself.
Ceiling fixtures that wobble or are not flush with the ceiling: Confirm that the mounting bracket and hardware are properly installed and tightened.

Key Takeaways
Upgrading your home lighting doesn't have to be a daunting task. With the right tools, materials, and knowledge, you can successfully install various lighting fixtures, adding style and functionality to your space. Remember to prioritize safety, follow the manufacturer's instructions, and be prepared to troubleshoot common issues that may arise during the installation process.