I. Introduction
Irrigation systems are crucial for maintaining healthy landscapes for residential gardens or large-scale agricultural purposes. Solenoid valves play a vital role in controlling the flow of water within these systems, ensuring efficient and reliable operation. This article provides an in-depth overview of the process of installing irrigation solenoids, with a focus on providing clear, concise, and easy-to-follow instructions.
II. Tools and Materials Required
Before beginning the installation process, gather the necessary tools and materials. Common tools include pipe cutters, wrenches, screwdrivers, and wire strippers. Required materials typically consist of pipes, fittings, wiring, and the solenoid valve itself. Specific types of pipe fittings and adapters may vary depending on the size and material of your pipes, such as PVC, copper, or PEX. Additional materials like thread seal tape, pipe cement, or compression rings may also be needed to ensure leak-free connections.
III. Preparing for Installation
Assess your existing irrigation system and determine the number of solenoid valves required. This will depend on factors such as the number of irrigation zones and the flow rate of each zone. Choose a suitable location for the solenoid valve, keeping accessibility for maintenance in mind. Ensure that the water pressure and flow rate are compatible with the chosen solenoid valve. Plan the layout of your irrigation system, including the placement of valves and wiring connections.
IV. Installation Process
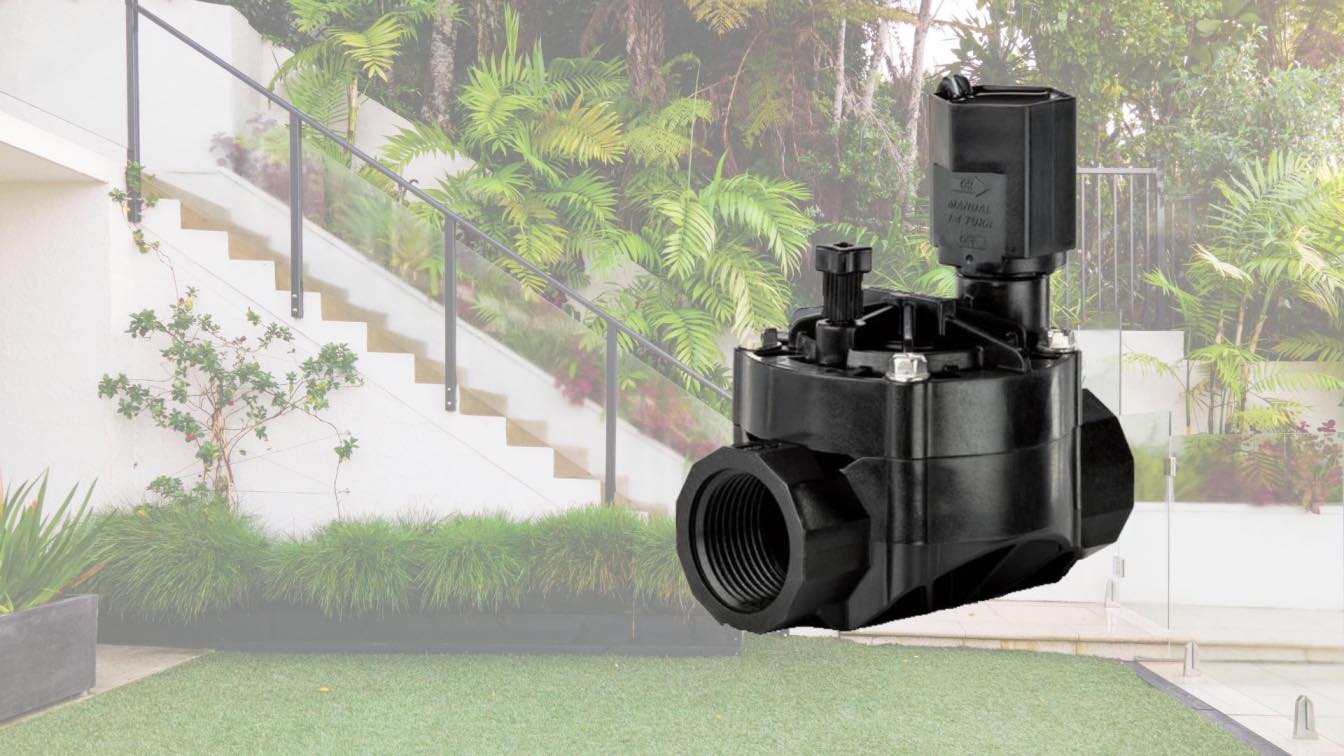
A. Connecting the main water supply line to the solenoid valve
With the water supply turned off, use a pipe cutter to create a clean, straight cut where the solenoid valve will be installed.
Prepare the pipe ends by cleaning and deburring them. Apply pipe cement or thread seal tape as needed, depending on the type of connection being made.
Install the solenoid valve, ensuring that the flow direction arrow on the valve aligns with the water flow direction.
Secure the connection using appropriate pipe fittings, such as threaded adapters or compression fittings. Allow sufficient time for any cement or sealant to cure before testing the system.
B. Connecting the solenoid valve to irrigation lines
Attach the solenoid valve to the irrigation lines that correspond to the specific zones the valve will control.
Use necessary fittings and adapters to ensure a secure and leak-free connection. Follow the same preparation and installation steps as used for the main water supply line connection.
C. Installing a suitable controller for the solenoid valve
Choose a controller compatible with your solenoid valve type and the desired level of automation. Options may include simple timers, smart controllers with weather-based adjustments, or fully automated systems that integrate with other smart
home devices.
Connect the controller's wiring to the solenoid valve according to the manufacturer's wiring diagram, ensuring proper wire selection and connection methods.
Mount the controller in a secure location, ensuring that it's protected from the elements and easily accessible for maintenance.
D. Electric wiring connections
Connect the power supply wires to the solenoid valve, following the manufacturer's guidelines. Ensure proper wire sizing and connection techniques to avoid electrical problems.
Ground the system by connecting the grounding wire to a suitable grounding point, such as a grounding rod.
Properly manage the wiring to ensure durability and organization, using zip ties, conduit, or cable organizers to secure and protect the wires.
V. Testing and Troubleshooting
- Test the solenoid valve's functionality by activating it through the controller and ensuring proper opening and closing. Listen for the valve's distinctive "click" sound as it opens and closes.
- Inspect the installation for leaks and proper operation, addressing any issues that arise. Double-check all connections, seals, and wiring if problems are detected.
- Common issues may include leaks at pipe connections, faulty wiring connections, or incorrect valve operation. Consult the manufacturer's documentation or seek professional assistance for troubleshooting guidance.
VI. Maintenance and Care Tips
Regularly inspect the solenoid valve and surrounding components for signs of wear, damage, or leaks. Set a maintenance schedule that aligns with seasonal changes or other landscaping tasks, such as fertilizing or pruning.
Clean and service the valve as needed, following the manufacturer's recommendations. This may include flushing out debris, checking for worn parts, or lubricating moving components.
Winterize the irrigation system as necessary, draining excess water and protecting the valves and components from freezing temperatures. Follow local guidelines and best practices for winterization in your area.
VII. Conclusion
Proper installation and maintenance of irrigation solenoids are crucial for efficient and reliable irrigation system operation. By following the steps outlined in this in-depth guide, you can successfully install and maintain your solenoid valves, ensuring a well-functioning irrigation system that meets the needs of your landscape or agricultural application.